
Wow Wax:
The essence of coloured waxIntroduce
There are many dental technicians studying how to create life-like porcelain restorations and in most case, the focus is on tooth morphology, colour analyzing, layering technique. The skills and knowledge that we as ceramists have learnt over many years and employ every day seem like second nature to us now. But for the ceramist who is starting out, or even a dentist - who is yet to have the opportunity to hone the skills required. The question is what is the best way to practice ? I was confused at how to improve my skills when I was a starting out. But fortunately I developed a good self-training method that I would like to share with you involving “colour wax”. It is a economic and easy step by step way that can be practiced in your own space and time to learning tooth morphology, tooth color analyses ,wax control and build-up technique all at the same time, the only thing you need are wax up instruments,colored wax and your passion.
Get colored wax

Colouor Toning Wax by SHOFU. There are 20 pieces with 9 colours : Translucent,dentin,enamel,opaque,white, black,blue and red , including instructions.
A reasonably priced product.

Yeti creation colored wax kit include 12 different colors with excellent color effect that can easily create natural tooth color wax up.

Crown & Bridge working wax like YETI, RENFERT can also be used on the colored wax exercises.

DIY Color Wax & Candles.
can be purchased in chemical stores or grocery stores like DASIO or IKEA. It is the cheapest but you need to take care of the melting temperatures of the wax and color effect.

Fig1Sliced First molar colored
wax with clear wax layers.

Fig2Try mixing two colours to create a new colour.
Let's do it
The best place to start is by finding an example of a natural tooth, either real or high quality photo that maybe found in a dental magazine, a book or on the internet etc. Choose a tooth that is appealing to you with colour or character that takes your interest. This will be used to study and try to reproduce the coluor characteristics and morphology of the tooth for your wax up.
I have provided a step by step guide with an example of waxing up a tooth color and root, using the colour wax-up technique. The examples are of two centrals and a firs molar: one in old age and the other of a youth. You can work on different applications for the coloured wax allowing you to create and highlight internal structure and form, from the step by step guide.
There are only three key points to note, the first is about controlling temperature ranges that will ensure that the wax does not melt, and mix with, the wax layer you have already built up through each step(fig1).
Second is the color selection. There is an interpretation of the color you see and the color you use. Although there are not as many colors in wax as there are in porcelain, you can try to mix the wan to create a new color. For example mix grey and enamel you can obtain grey translucent color(fig2).
Third, you also have to consider about the final morphology within the wax up exercise.
Old age step by step

1.The initial body layer is applied using RENFER sculpturing opaque color wax.

2. Using YETI Creation orange color to layer on cervical third to increase the chroma.

3. Mix gray and enamel 1:1(YETI) as deep gray translucent is added to incisor third to create the deep gray translucent effect.

4.Blue translucent(YETI) is applied on incisor edge and extended to mesio-diatal side.

5.Using orange(YETI) with very thin layering on incisor area as the sunset effect.

6.Creating crack line with SHOFU opaque color or light red brown(YETI) by very fine point wax up instrument and moving straight line quickly at low temperature.

7.The luster layer is applied using gray translucent(YETI) all over the crown .
8.Fabrication of opal effect with light dentin and white(YEYI) on the incisor edge, after adjust the shape, use separator on the surface as glazing finishing.

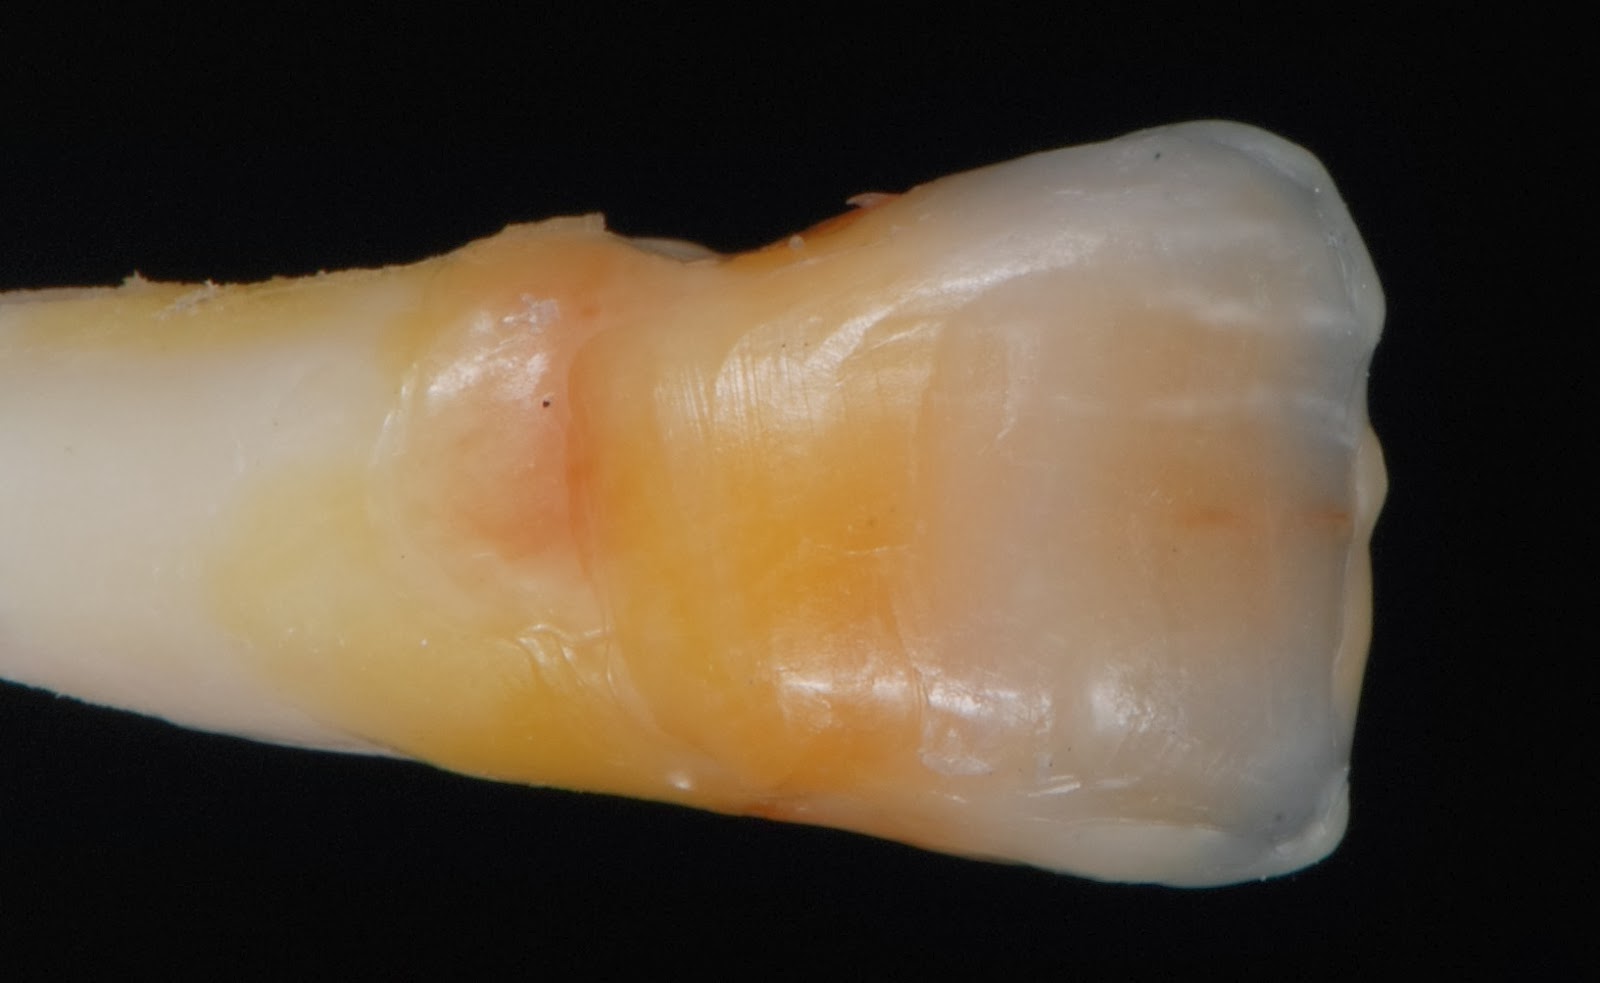
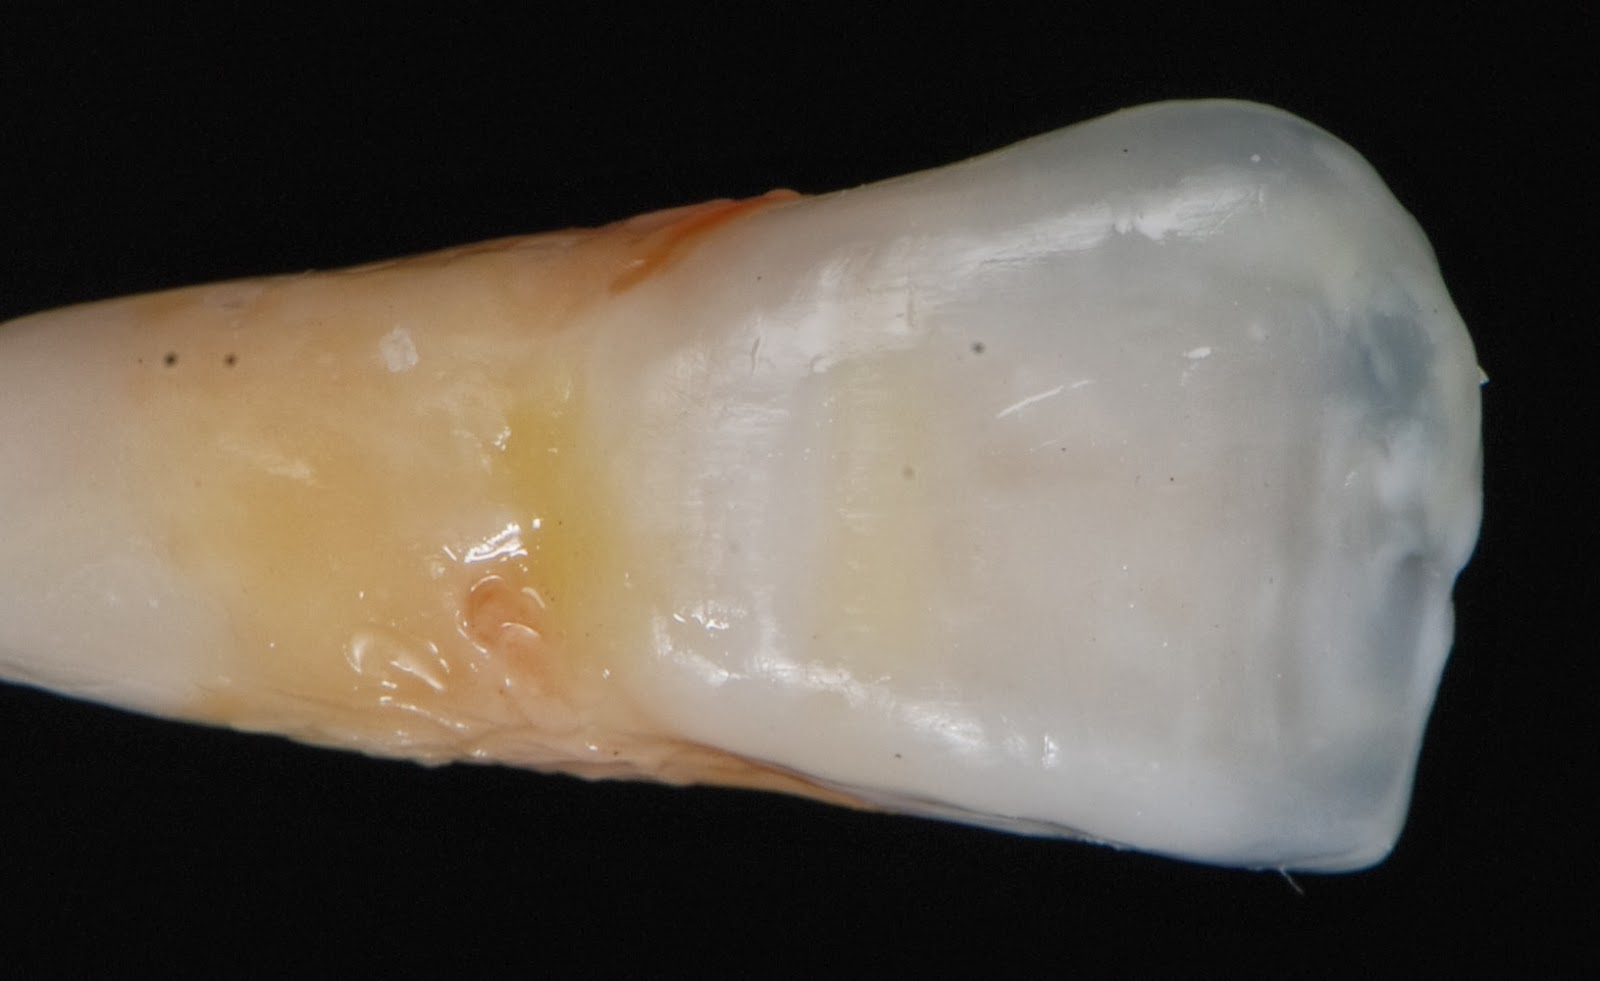
The shade and shape with old age tooth colour wax-up.
Youth step by step

1.The initial body layer is applied using RENFER sculpturing opaque color wax.

2. Blue translucent(YETI) is applied on incisor edge and extended to mesio-diatal side.

3.Using yellow(YETI) with very thin layering on incisor area as the mamelon of finger structure and on the middle as yellow band.

4. Mix grey and enamel 1:2(YETI) as light grey translucent, then cover on the mamelon carefully to create deep translucent effect.

5.Using enamel(YETI) with very thin layering on middle and incisor areas.

6.Using white and yellow(YETI) on incisor zone to construct the character of horizontal white band.

7.Fabrication of opal effect with light dentin and white(YEYI) on the incisor edge.
8.The luster layer is applied using grey translucent(YETI) all over the crown with thin layering. after adjust the shape, use separator on the surface as glazing finishing.

The shade and shape with young age tooth colour wax-up.
First molar

1.The initial body layer is applied using RENFER sculpturing opaque color wax.

2. Using YETI Creation orange color to layer on occlusal fossa and mesio-distal cervical area as internal stain technique.

3.The dentin layer is applied using RENFER sculpturing white colored wax.

4.The enamel layer is applied using grey translucent(YETI) all around crown then blue translucent(YETI) is applied on occlusal marginal ridge.

5. Mixing whiter and translucent(YETI Creation) to layer on cusp tips and occlusal ridge

6.The luster layer is applied using enamel and gray translucent(YETI) all over the crown. after adjusted the shape with a wax up instrument then use separator on the surface as glazing finishing.

The shade and shape of first molar with tooth color wax up.
Reference
1 Ubassy, The color and shape.
2Tyler P. Lwassegne,DDS,CDT, ESTHETIC WAX-UP,QDT 2010.
3.Paul Kano,Challenging natural.
4. Yi-Yuan Chang, Essence Aportfolio of dental ceramics.
About the author
Leo Liao was born in 1985, educated in Taiwan and has over 5 years experience as a dental technician/ceramist working with colored wax. Through this technique he has found a good way to self-train. He is currently working as a ceramist with SHO dental laboratory in Melbourne, Australia.


0 意見:
張貼留言